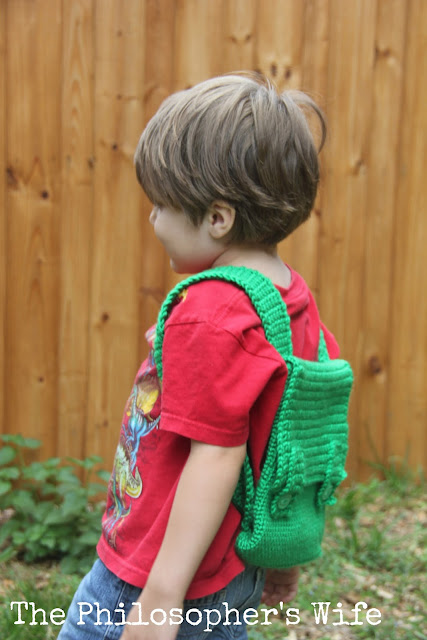
I received the yarn for this project in exchange for my honest review. This post contains affiliate links. This means that if you purchase something after clicking on one of these links I might receive a small commission. This is no way affects the price that you pay.
When Love Knitting asked if I would be interested in reviewing some of their yarn, of course my answer was yes! Who's surprised? No one?Yarn My middle child's favorite color is green, and it was his turn for some Mama made goodies, so this Main Street Yarns Shiny + Soft in Grass Green was perfect. It is a 100% acrylic yarn. It can be machine washed and dried, a huge plus for a kid's item! The skein had 356 yards, which was a perfect amount for this project, I had only the tiniest amount of leftover yarn. The yarn worked up quite easily with nice stitch definition. It is nice and soft right out of the box. There's a slight sheen, or shininess, to it.
Hook I used my Clover Amour size 7 crochet hook. This is a little smaller than the recommended hook size of H/5 mm. I wanted the body of the bag to be rather densely crocheted, to keep all of my little adventurer's finds from escaping.
(Free!) Crochet Pattern
Bag
Chain 26.
Round 1 IN TOP LOOP ONLY Single crochet (sc) in second chain (ch) from hook, and in each of the next 23 chains (24 sc). Work 3 sc in the last chain. Work back down foundation chain in opposite loop. (23) 3 sc in last chain. slip stitch to join.
Round 2 Chain 1. (Working in both loops) 2 sc in the first stitch. Sc in next 23sc. 2 sc in each of the next 3 sc. Sc in next 23 stitches. 2sc in each of the next 2 sc. slip stitch to join.
Round 3 2 sc in first sc from previous round. Sc in next 25. 2sc in next stitch. 1 sc. 2sc in next stitch (at the "end" of the oval). 1 sc in next stitch. 2 sc in next stitch. 25 sc. 2 sc in same stitch. 1 sc. 2 sc in next stitch ("end" of oval). 1 sc. slip stitch to join.
Round 4 2sc in 1st stitch. 28 sc. 2sc in next stitch. 1 sc. 2sc in next stitch (at the "end"). 1 sc in next stitch. 2 sc in next stitch. 28 sc2 sc in same stitch. 1 sc. 2 sc in next stitch ("end"). 1 sc. slip stitch to join.
Round 5 Chain 1. IN TOP LOOP ONLY sc around. Slip stitch to join.
Rounds 6-44 Chain 1. Sc around. Slip stitch to join. (72 stitches total)
Round 44 Chain 1. Sc 4. 32 in back loop (inside the bag) only. 36 sc. slip stitch to join. (Note: the 32 back loop only should be centered along the back of the bag. Adjust accordingly if needed. This is where the flap will be added later.)
Round 45 Chain 2. sc around. (72)
Round 46 Slip stitch around.
Flap
Row 1 Single crochet in each of the front loops left from round 44. (32)
Rows 2-27 Chain 1. Turn. Sc across. (32)
Strap
Make two.
Chain 7.
Row 1 Sc in second chain from hook. Sc across. (6)
Rows 2-72 Chain 1. Turn. Sc across. (6)
Button Flaps
Chain 5.
Row 1 Sc in second chain from hook. Sc across. (4 sc stitches)
Rows 2-12 Chain 1. Turn. Sc across. (4)
Row 13 Chain 1. Turn. 1 sc 2 ch 1 sc. (This forms the button hole.)
Rows 14 & 15 Chain 1. Turn. Sc across. (4)
Finishing Sc evenly around, with three stitches in each corner.
Assembly
Whip stitch the straps to the bag, lining up the edge of the strap with the edge of the flap.
SC around all edges other than the opening.
Whip stitch the button flaps onto the bag flap.
Sew buttons.
Enjoy!


