Showing posts with label headband. Show all posts

Saturday, March 14, 2020

Free Crochet Pattern: Twisted Knot Ear Warmer

This post contains affiliate links.

This crocheted Twisted Knot Ear Warmer works up quickly and makes an adorable accessory!

The yarn is from Kimarie's Knit Knacks.  It's called Unicorn Fields.  I've been hoarding the remainder of the skein from my Sterling Unicorn Hat waiting for inspiration to strike.  I actually had started a couple of projects with the yarn, but they just didn't seem worthy so they were frogged.  The colors are striking, and it's so squishy and soft.  Such great yarn!

Free Crochet Pattern of Sterling Unicorn Hat

Ear warmers are all the rage!  I've even seen a fair share of them here in Central Florida.  As I was cleaning my craft area I came across this yarn again and inspiration struck!  The very next afternoon between homeschooling and library books this Twisted Knot Ear Warmer came into existence.


The lovely, knit-like, detail in the texture of the headband comes from crocheting in the third loop of the half-double crochet below it.  If you haven't done this before it might sound intimidating, but it's really easy once you know what you know where to look!

When working a row of crochet you (generally) end up with a "v" on the top.  The side of the "v" closest to you is referred to as the "front loop" and the side of the "v" further away is the "back loop".  In a half-double crochet there is actually a third loop that's under the "v" that is made from the yarn over (YO) in the stitch.  "HDC in the third loop" means that you are going to create your hdc stitches around this loop under the "v". Doing this will force the "v" to face the front.

Chain 111 using an F hook.

Row 1: Skip the first chain and half-double crochet (HDC) across. This should give you 110 stitches.  Chain 1 and turn.

Row 2: HDC in third loop.

Repeat rows 1 & 2


At this point you have a nice flat, knotless, fabric.  You could sew the ends together and call it a day--that would leave you with a perfectly lovely ear warmer.  However, if you'd like to add a little more flair, then you need one more step.


To achieve the trendy twisted knot we need to sew the ends together just right.  Fold the ends lengthwise so that you end up with four ends.  Alternate the sides and then sew.  I find it helpful to baste first and check to make sure that everything looks right before the final sew.  When sewing the finishing bit, make sure to catch all four layers of fabric.  This is very important!

If you're having trouble envisioning the above step try this first: Make a "c" with both of your hands--your left hand will be a correct "c" and your right will be backwards.  Put them together with your left hand fingers on top, right hand fingers next, left hand thumb, and finally the right hand thumb.

Weave in any ends and enjoy!  (Side note: I know that plastic yarn needles are really popular, but I really love my stainless steel yarn needles.)


Thanks for visiting my blog!  

I love to link up at all of these wonderful blogs!

Other posts that you might enjoy:

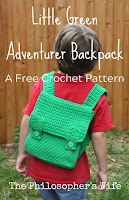
 A boy in a red shirt is wearing a crocheted green backpack.  There is wooden fence in the background.  The boy's face is hidden.  

Thursday, July 17, 2014

An Easy Scalloped Headband Crochet Pattern


I'm quite happy with this crochet headband pattern that I whipped up.  It's quick, easy, and pretty -- three things that I like in a project.


It uses only basic crochet skills, so it's great for beginners as well as more experienced crocheters.

Materials and equipment:

Hook: E/3.5 MM
Yarn: Aunt Lydia's crochet thread in white
One ponytail elastic

  • Start by crocheting three singles crochet stitches around a hair elastic. Chain one and turn.
  • Single crochet across each stitch (3), chain one and turn.  Repeat until headband reaches your desired length.  Crochet around the hairband again on the last row.
  • Single crochet around the edge.  If you want a very simple headband you could stop here.   
  • *Single crochet, skip one stitch, five double crochets in one stitch, skip one stitch*, repeat around entire headband.

Catherine wanted in on the photo shoot, so here she is with her many "photo faces".  That cheesy smile makes me chuckle every time.


I'd love if you'd add this to your Ravelry queue, or one of your Pinterest boards!


I love sharing my projects at places like these and Hookin on Hump Day!

Monday, February 3, 2014

Child's Headband Crochet Pattern


Catherine has been watching me work on my Purple Ribbed Cowl and asked me to make her something with the leftover yarn.  There wasn't a whole lot left, so I improvised and made her this headband.  Lucky me, she loves it!

Photo editing by the talented Sarah Piron.  You can find her at The Roasted Legend.
(I'm still rather new at writing patterns, so if you have any questions, or something doesn't seem right, please ask!)

I used Lion Brand Homespun yarn and an H hook.

Chain 3.
Row 1: Skip one chain, 2 sc, ch 1, turn.
Rows 2-6: 2 sc, ch 1, turn.
Row 7: 2sc in each st (4 stitches total), ch 1, turn.
Row 8-12: 4 sc, ch 1, turn.
Row 13: 2sc in 1st st, 2 sc, 2sc in last st (6 stitches total), ch 1, turn.
Rows 14 -54: 6 sc, ch 1, turn.  (This is where you should add or subtract rows as necessary for proper fit.)
Row 55: 1 sc dec, 2 sc, 1 sc dec (4 stitches total), ch1, turn.
Rows 56-60: 4 sc, ch 1, turn.
Row 61: 2 sc dec (2 stitches total), ch 1, turn.
Row 62-66: 2 sc, ch 1.
Slip stitch ends together.
Single crochet around both ends.  (I actually did this twice for a more defined edge.)
Add any crocheted flower you'd like.  (I have two patterns that you might like, a rose and a cute little five petal flower.)
Weave in ends.
Enjoy the cuteness!


Follow on Bloglovin 


I love to share my projects at various parties including these!